iPadOS 16 is finally available for iPad users, and it brings new features such as Stage Manager and iCloud Shared Photo Library. The update also adds the Weather app for the first time on iPad, as it was previously available exclusively on iPhone. Read on for a hands-on look at the new Weather app for iPad and tips on how you can use all of its features.
Brought to you by Mosyle, the only Apple Unified Platform. Mosyle fully integrates 5 different applications on a single Apple-only platform. Businesses can automatically deploy, manage & protect all their Apple devices. Request a FREE account to learn how to put your Apple fleet on auto-pilot at a price point that is hard to believe.
Apple’s Weather app is now on the iPad
For years, the iPad never had a native Weather app, so users had to download third-party apps from the App Store. Luckily, with iPadOS 16, Apple brought its own Weather app to the iPad. iPhone users are probably familiar with the app, but still there are some tricks that not everyone knows.
Since Apple acquired Dark Sky in 2020, the Weather app on the iPhone has gained several new features. With iOS 15, Apple has revamped the app’s animations while also adding maps and more detailed information. All of these features are also available in the iPad app.
Overview
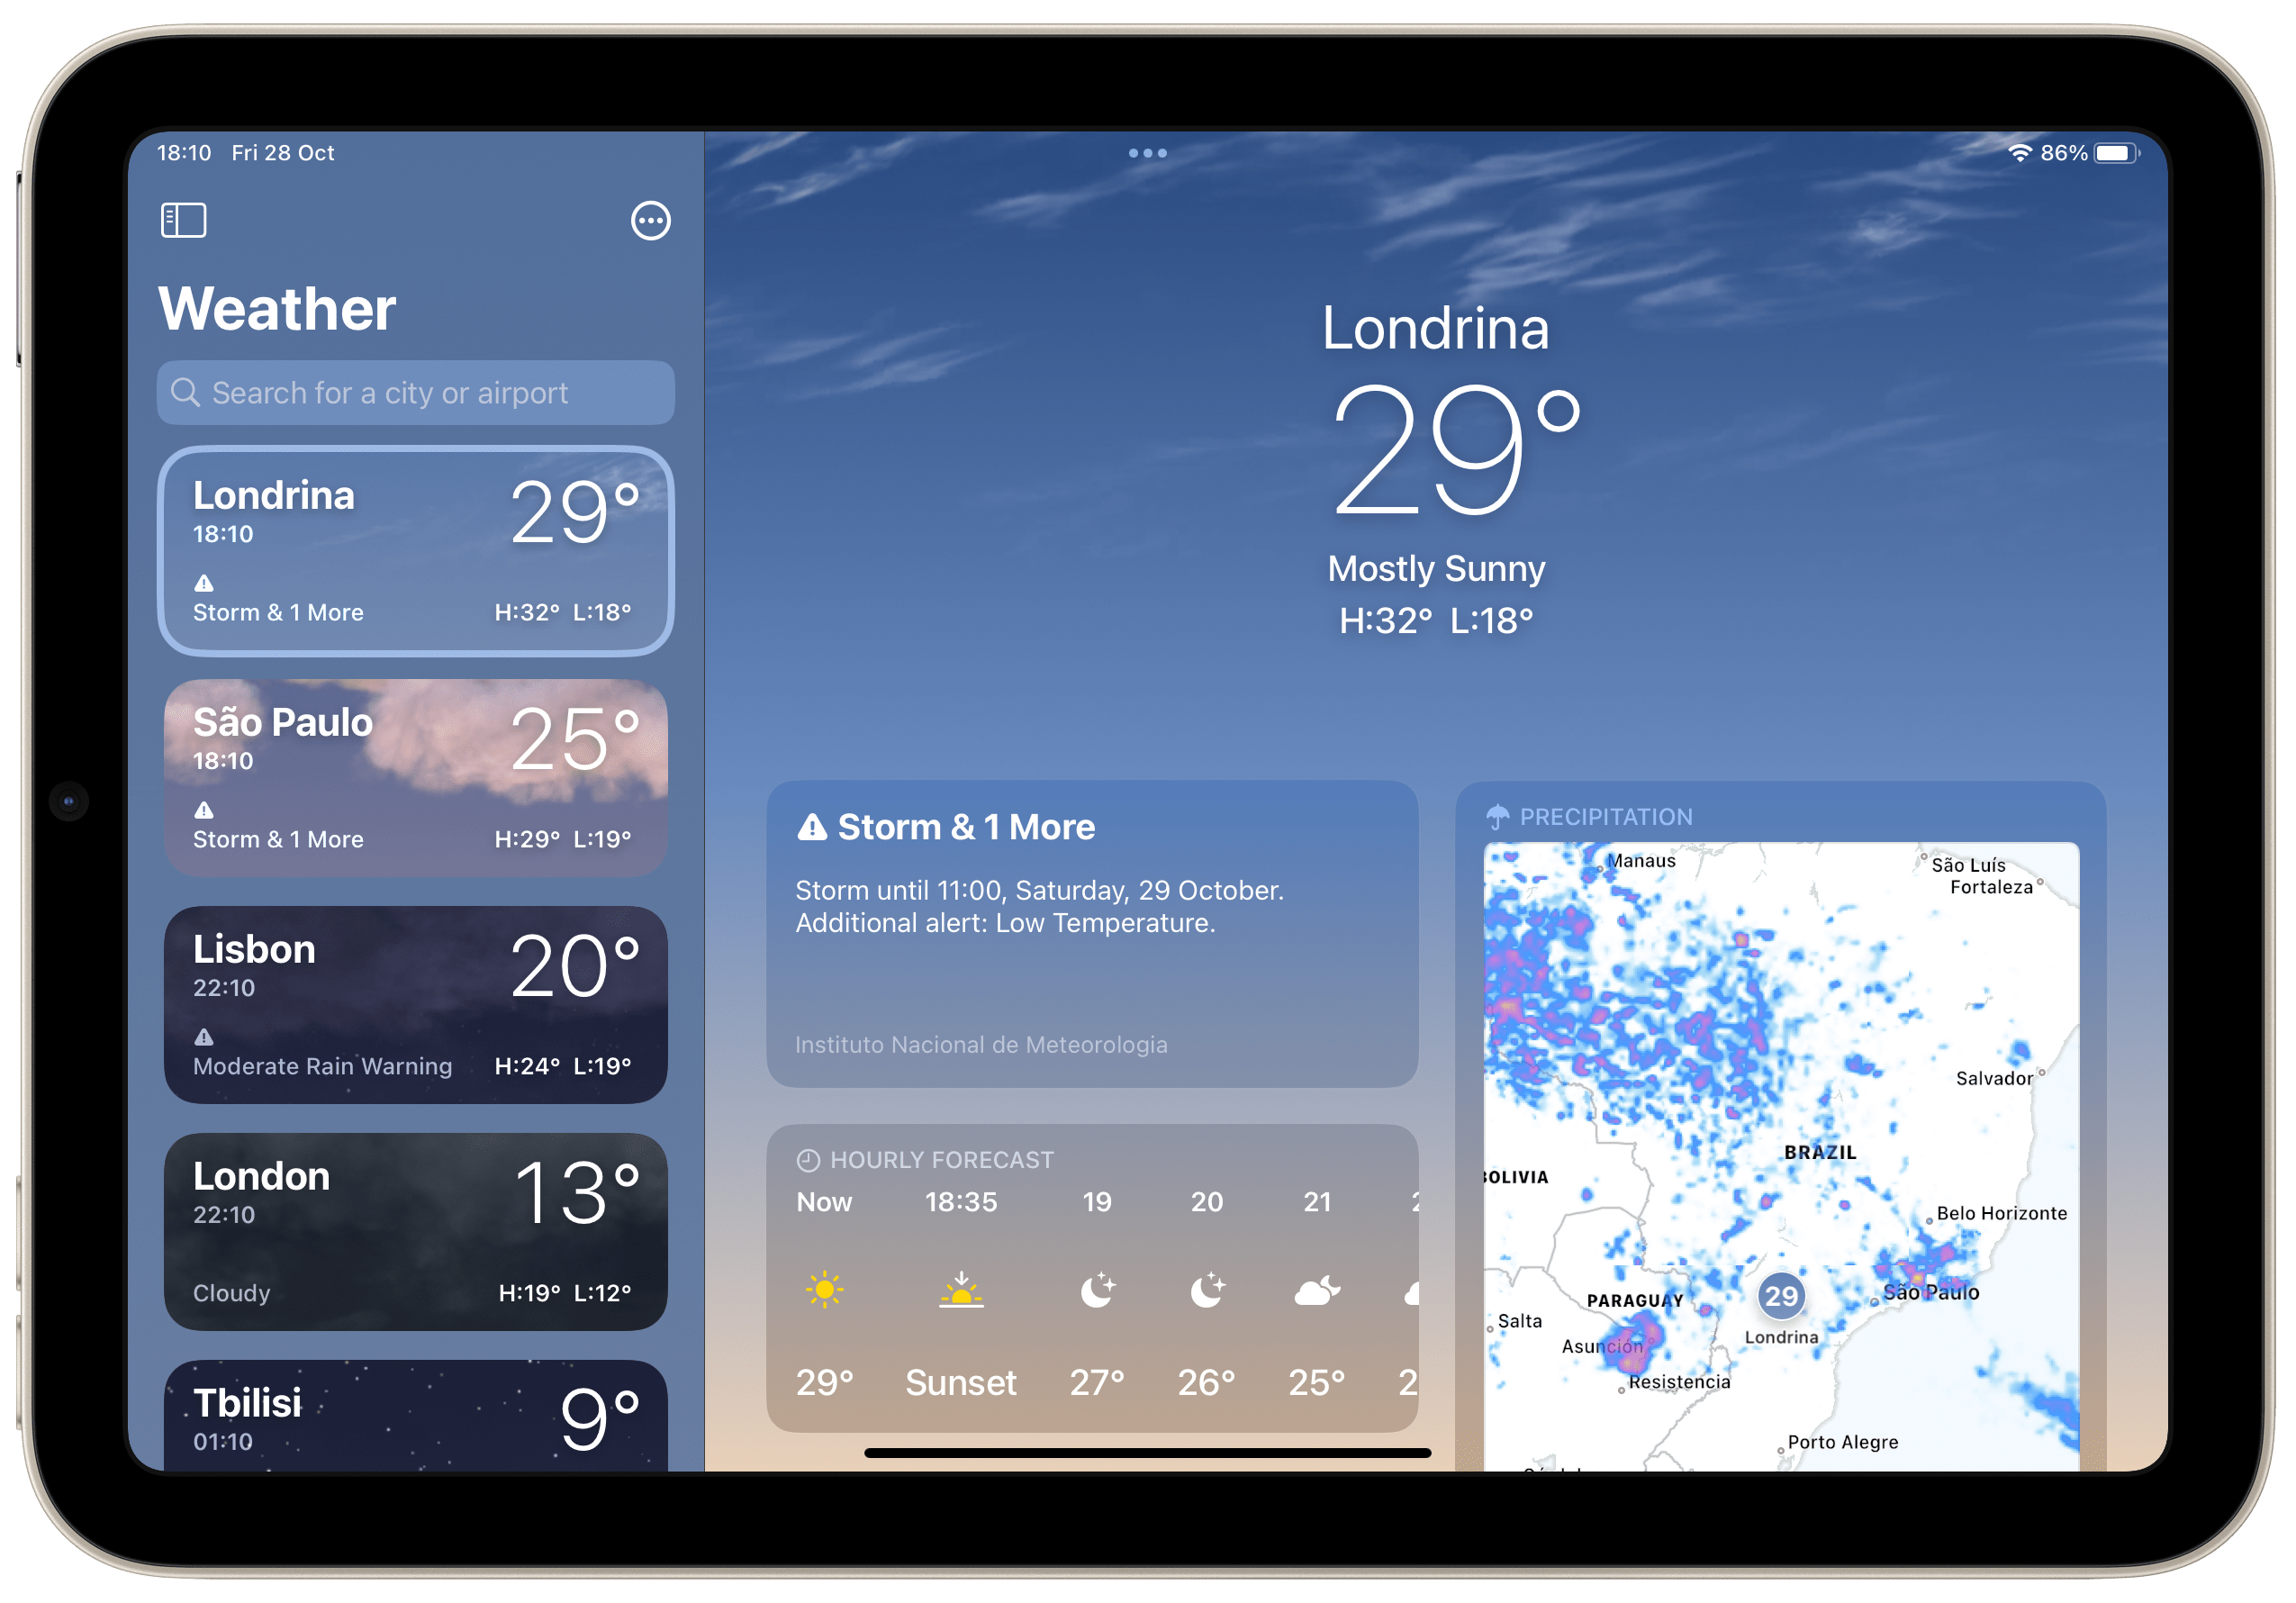
Once you open the app, you’ll find a beautiful overview of the weather forecast at your current location or in the city you have chosen. There are details such as hourly forecast, 10-day forecast, wind, visibility, precipitation map, UV index, and sunrise time. With just a simple scroll, you can find even more details in the app.
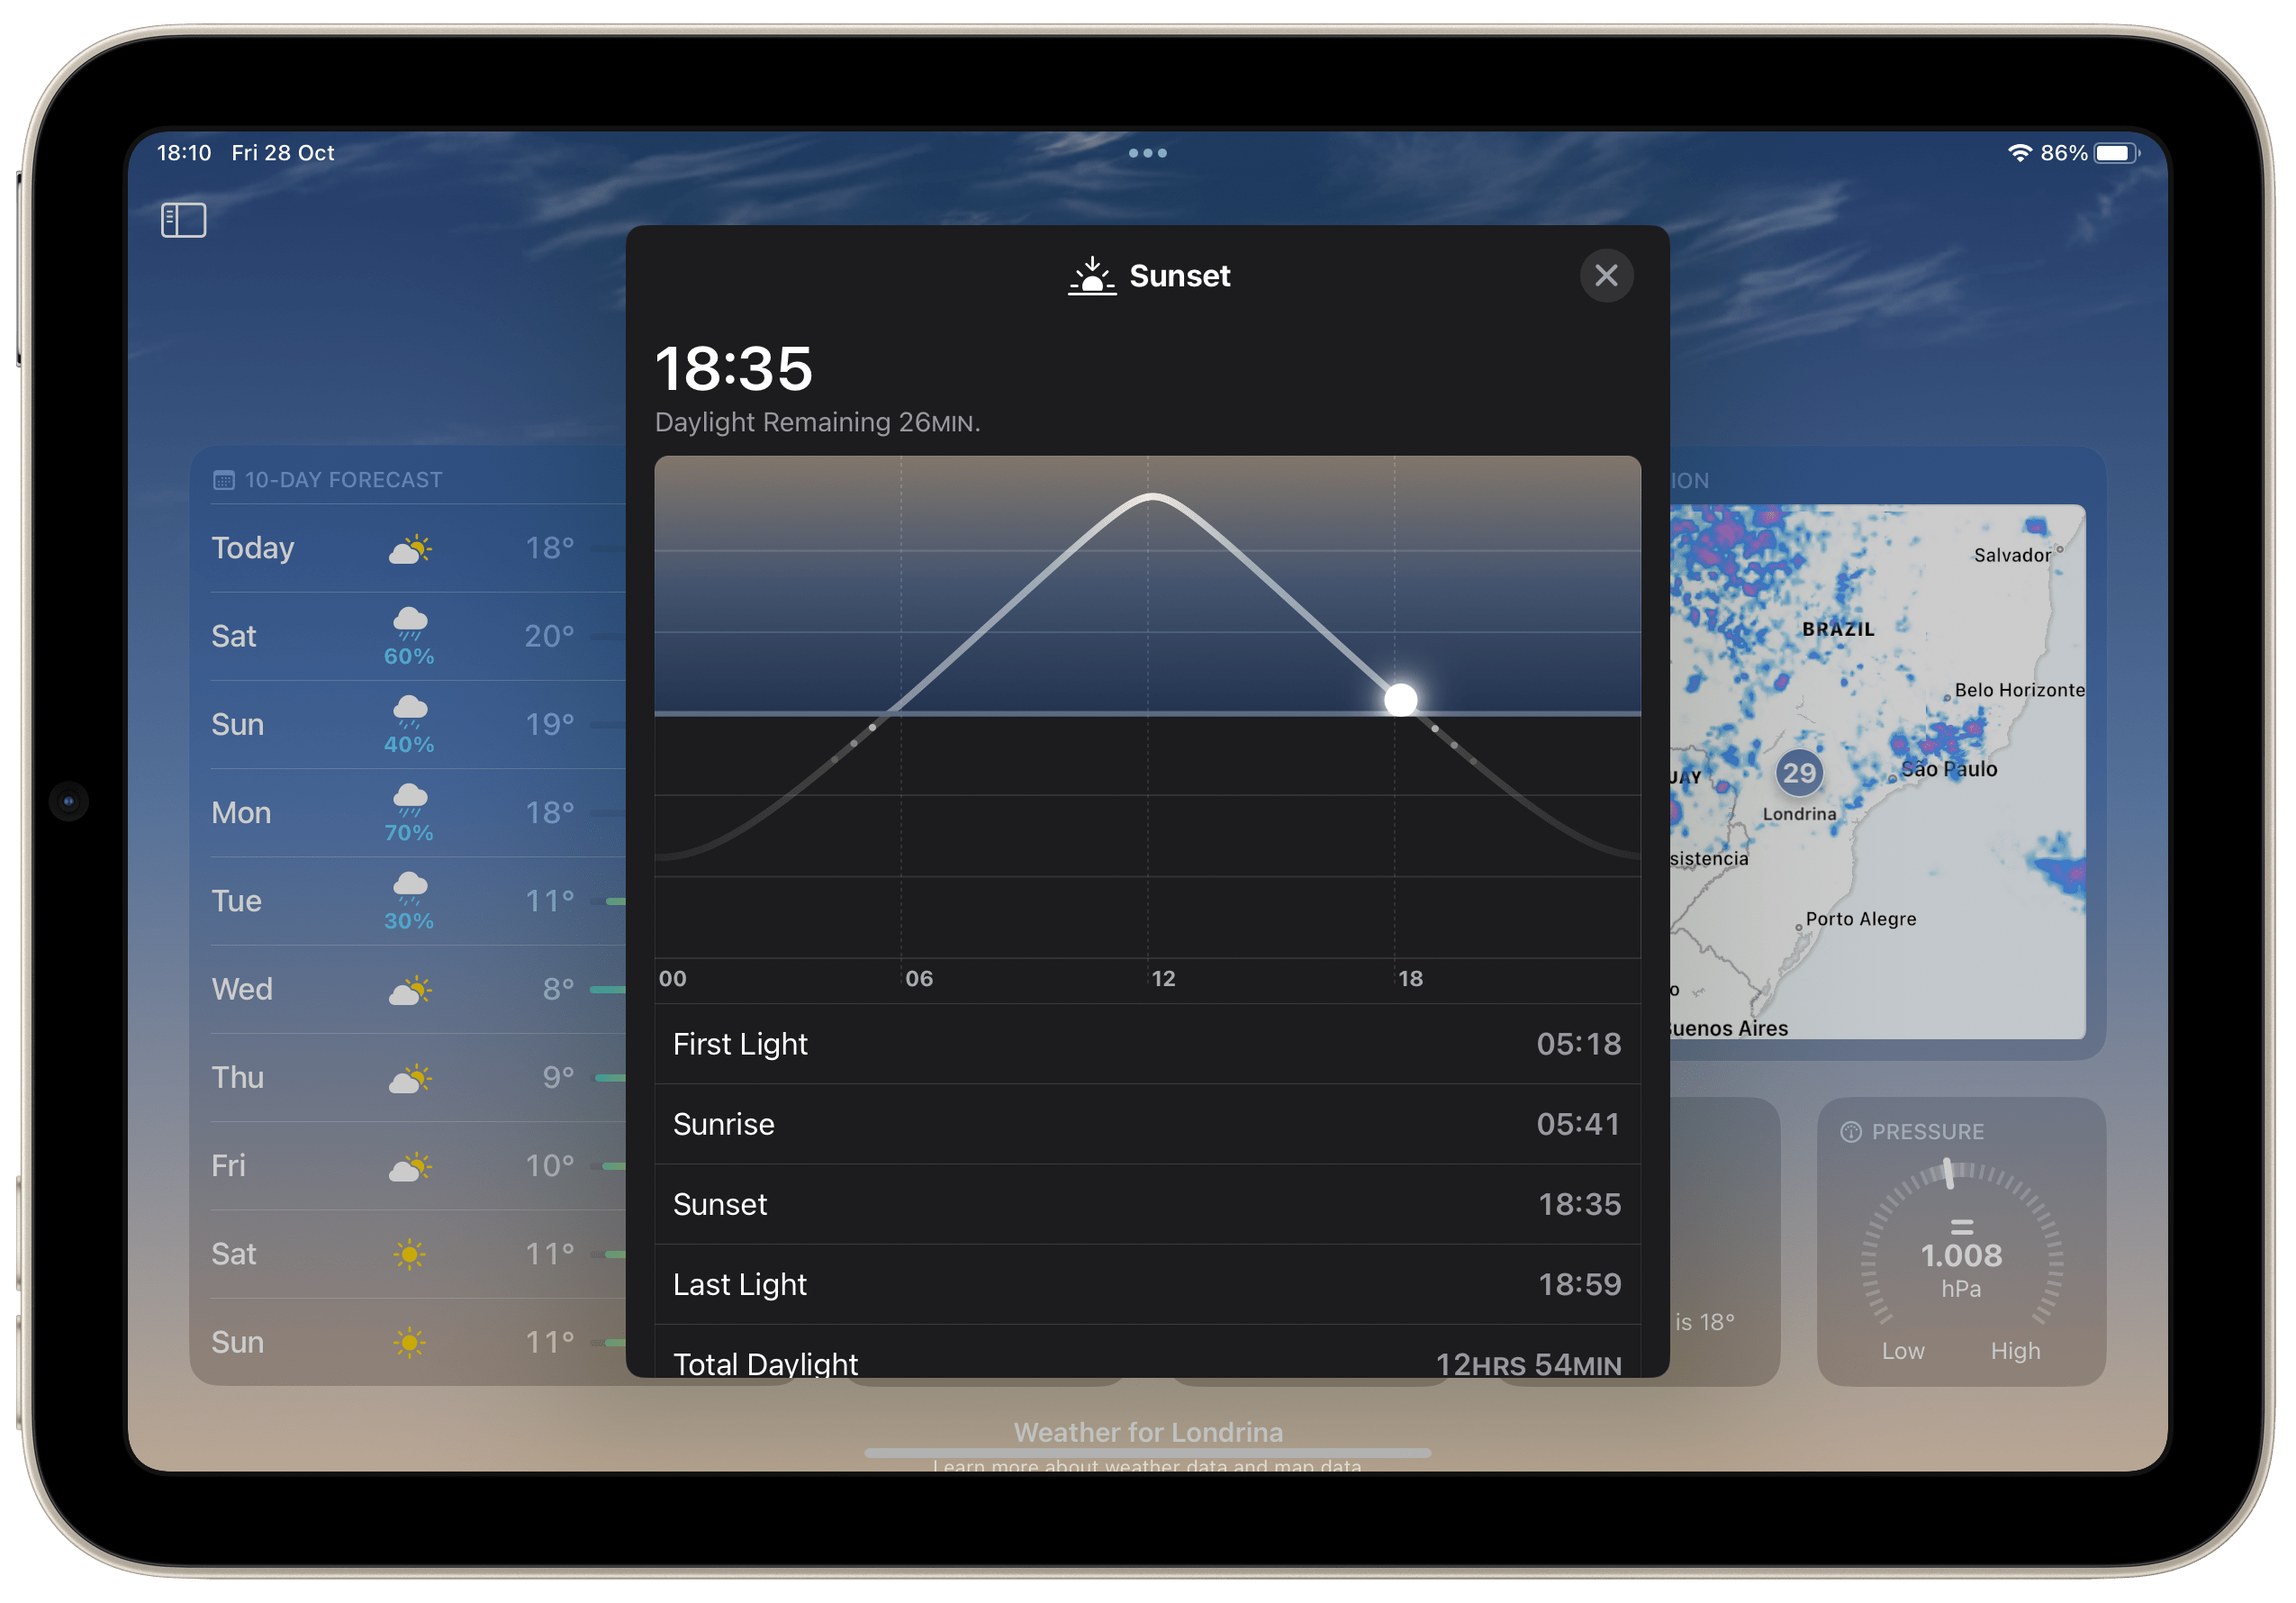
But here’s where things get even more interesting. If you tap any of the information cards, the app shows you even more details about the weather. For example, tapping the sunrise card brings up a graph that also shows the time of sunset and last light. You can also tap on the forecast to see the temperature variations over a 24-hour period.
There are also interactive maps that can show different information depending on what you choose. Tap the precipitation map to expand it with an animated 12-hour forecast. By tapping the options button at the top right side of the screen, you can also see a representation of the current temperature for each region on the map.
Add more cities or your current location to the app
One of the nice things about Apple’s Weather app is that you can select multiple cities to check the weather forecast for all of them. Just tap the button at the top left side of the screen to show or hide the list. There, you can use the search bar to find a city or even an airport.
To add a new city to your list, just tap the Add button. And, if you want to remove a city from your list, swipe from right to left on the list to delete it.
The app is able to detect your current location, so you don’t need to add it manually. However, this option requires that you allow the Weather app to use your location under the privacy settings. Of course, you can also choose not to share your location with the app. Here’s how to change these settings:
- Open the Settings app.
- Go to the Privacy & Security menu.
- Choose Location Services.
- Look for Weather in the list.
- Choose the option you want.
Set up weather alerts
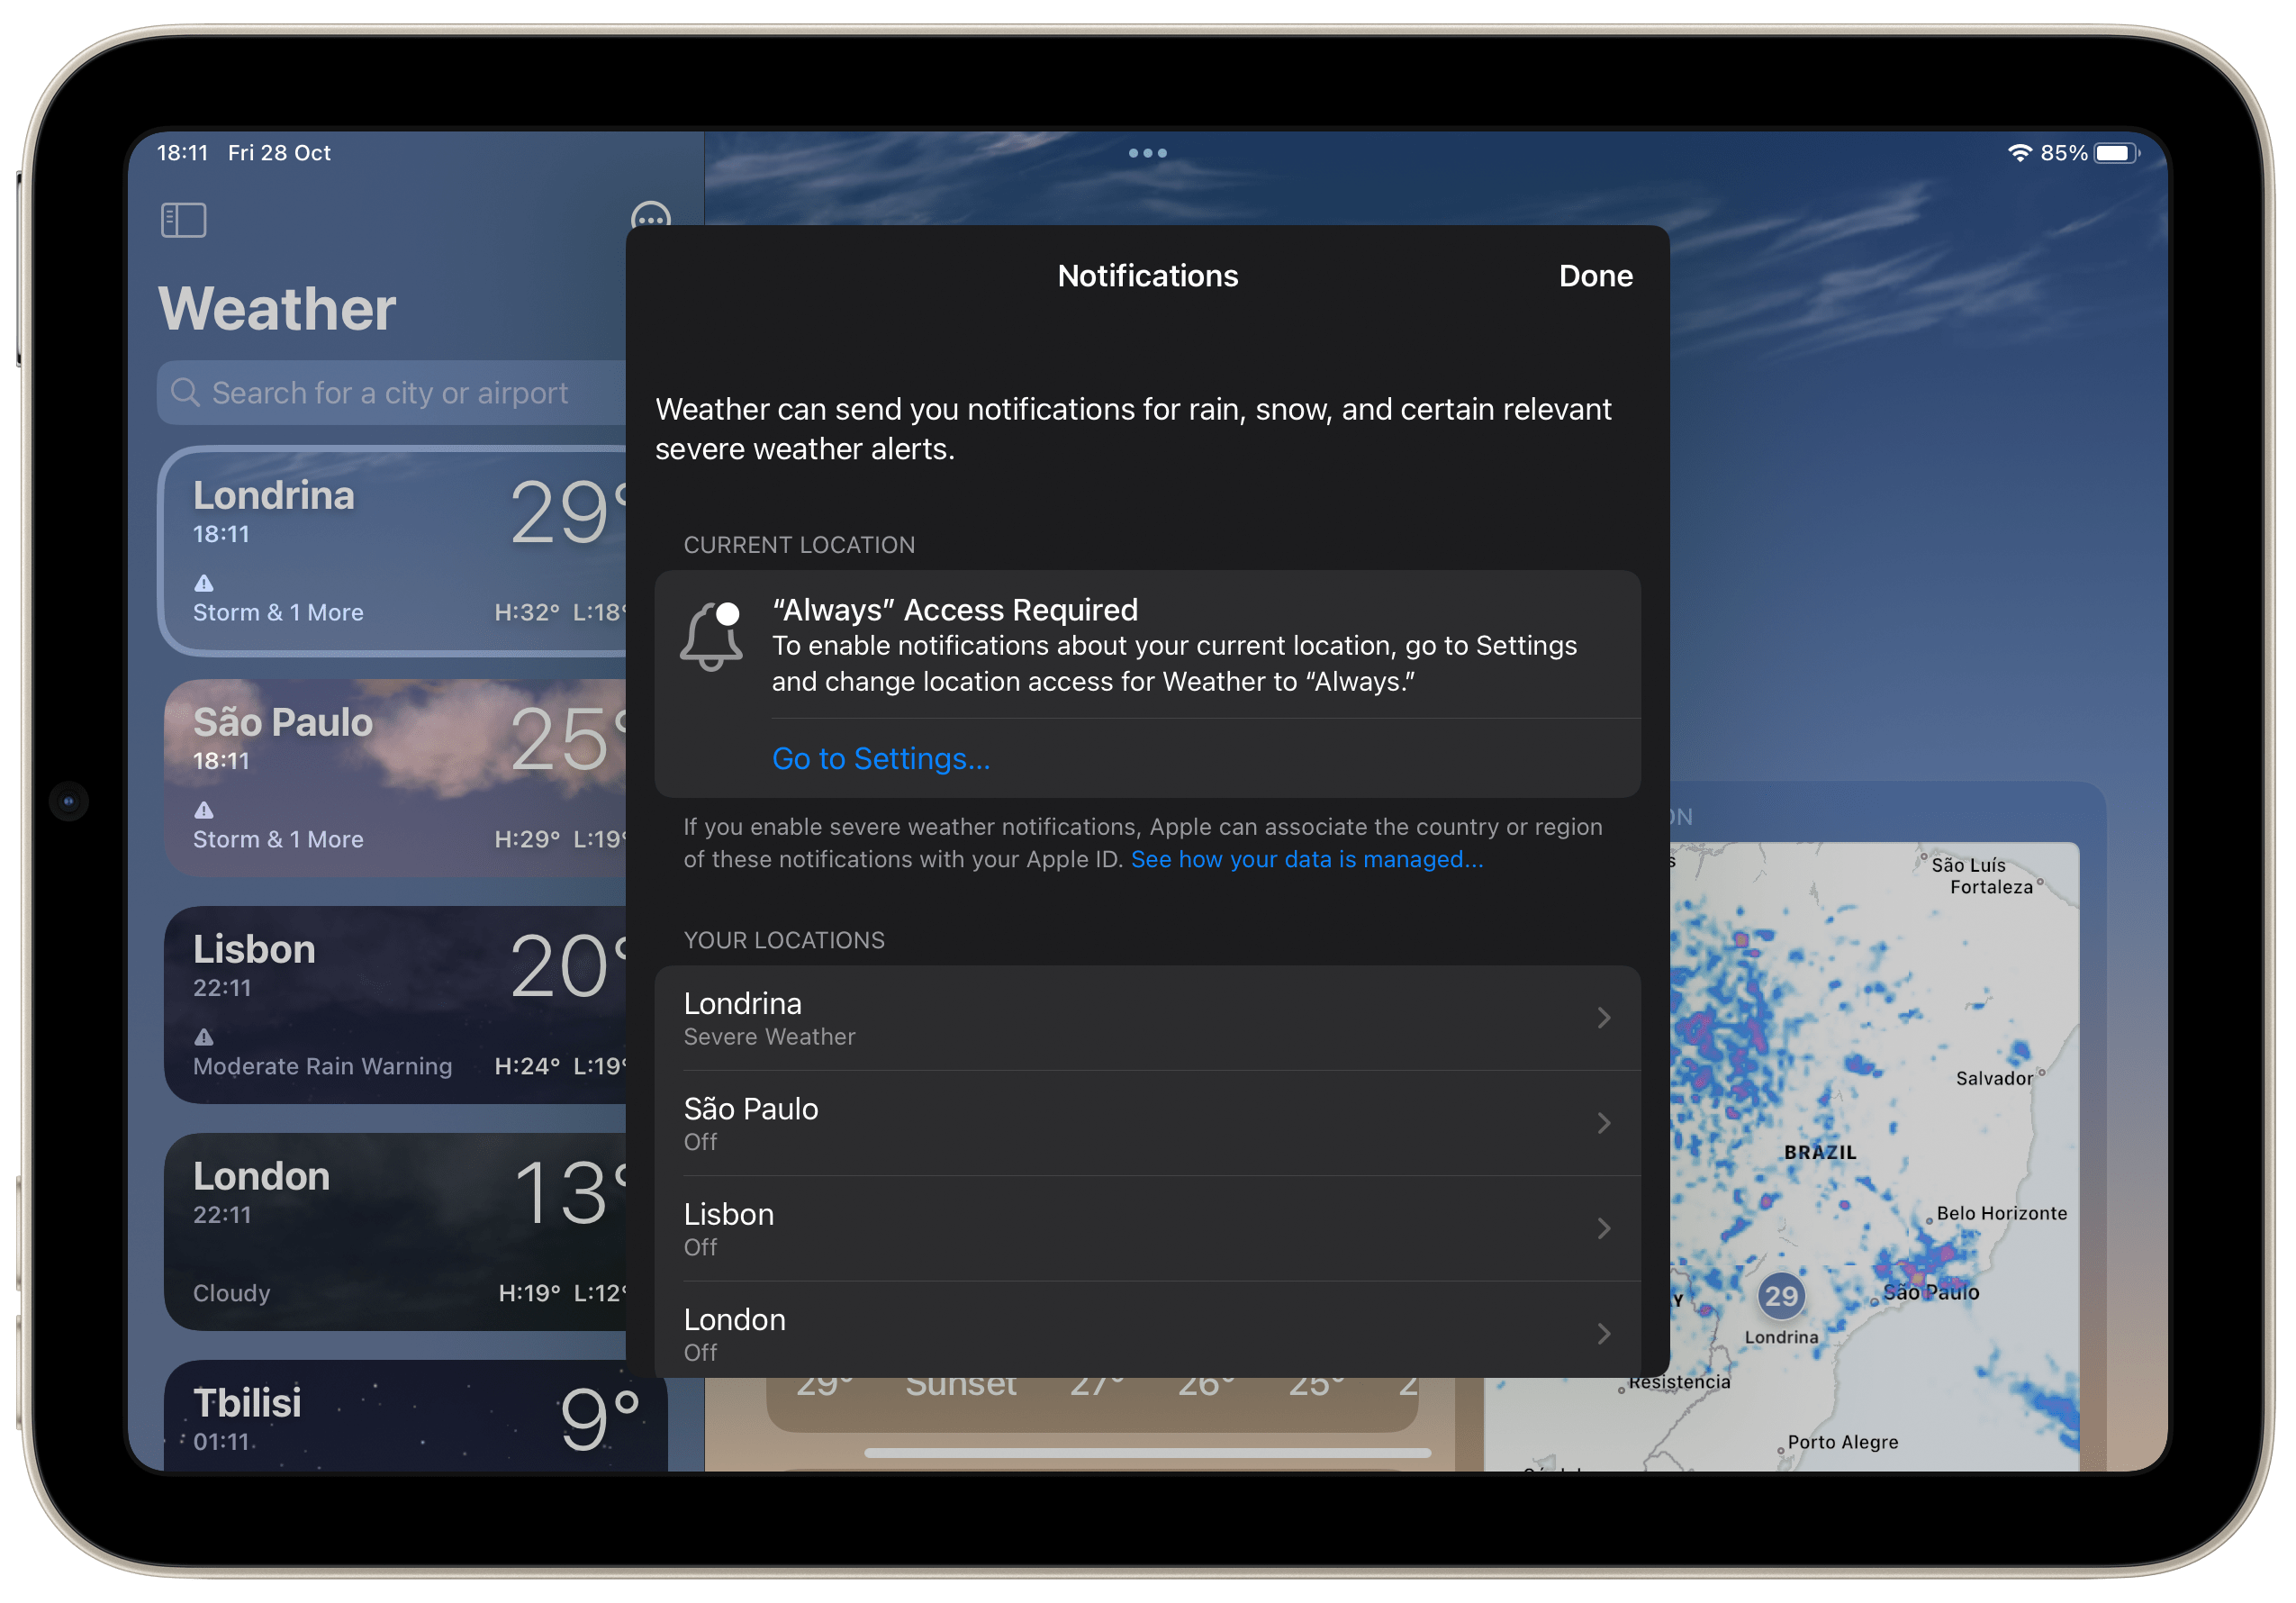
The Weather app on the iPad can also provide important alerts depending on your location. For example, it can warn you about rain, snow, and other relevant conditions. For that, open the list of cities in the app and tap the three dots button. Then, choose the Notifications option and turn on the alerts for the cities you want.
It’s worth noting, however, that notifications are not available for all cities.
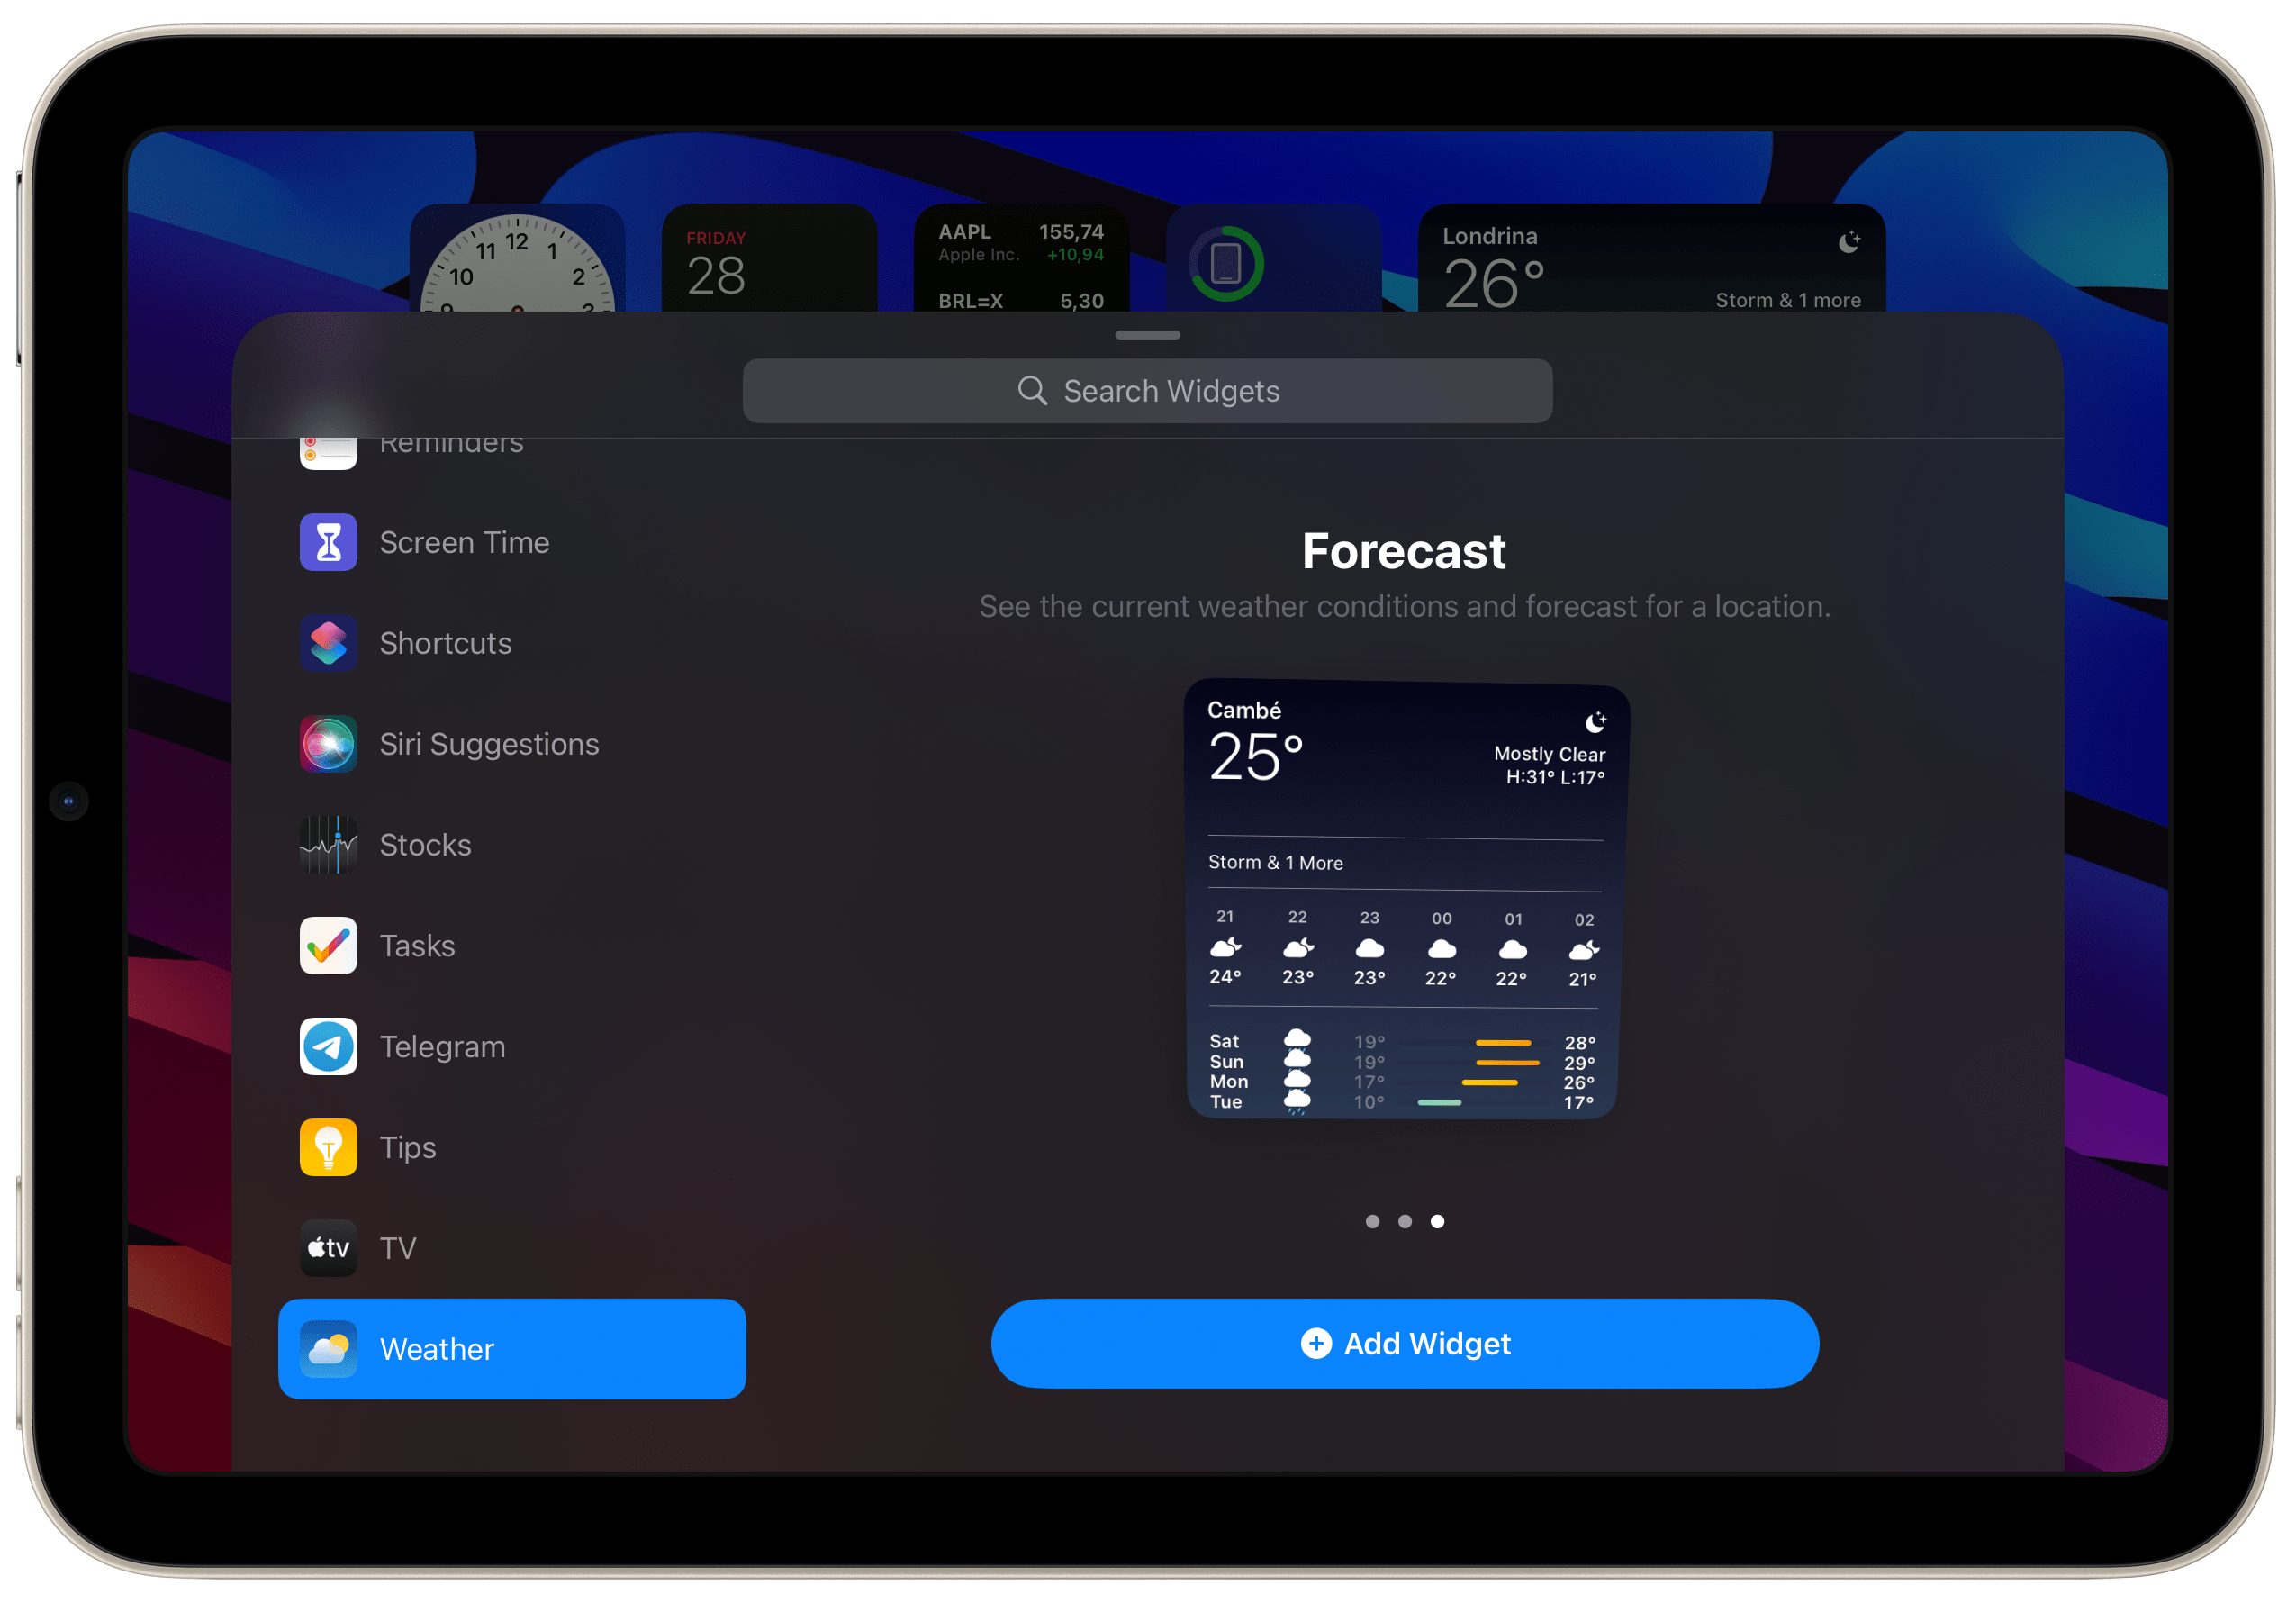
Last but not least, iPad users can also quickly check the current weather directly from the Home Screen by adding a widget:
- Press and hold the Weather app icon on the Home Screen of your iPad.
- Choose the Edit Home Screen option.
- Tap the + button in the upper left corner of the screen.
- Look for Weather in the list.
- Choose the widget you want and tap Add Widget.
Wrap up
These are some tips that will help you get the most out of the Weather app on your iPad. Do you know any other tricks for the app? Let us know in the comments section below.
This article is brought to you by Mosyle, the only Apple Unified Platform. Mosyle fully integrates 5 different applications on a single Apple-only platform, allowing Businesses to automatically deploy, manage & protect all their Apple devices. Request a FREE account today and discover how you can put your Apple fleet on auto-pilot at a price point that is hard to believe.
FTC: We use income earning auto affiliate links. More.


